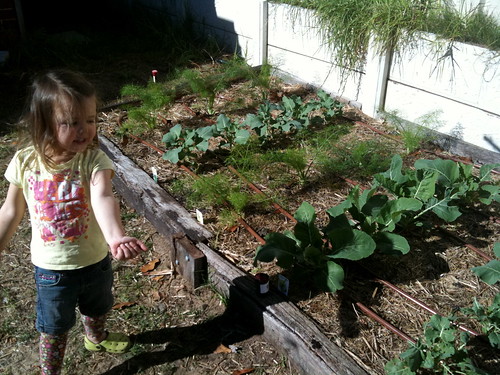
Well our seedlings are coming along nicely now, after a month in the ground plus a couple of good rainfalls. Interestingly, the last line of brassicas - caulies and brocolli (to the right of the picture) - are more damaged by white cabbage moth than the others - I'm putting it down to the interplanting with fennel, as nothing seems to attack that and it is quite fragrant when it's a warm day.
Clancy and I also planted some peas and beans up the other end of the bed, with some parsley as well. I had planted some Aussie red garlic in between the brassicas a couple of weeks ago too. They are sprouting well now.
Clancy also planted what we think is a kohlrabi and a broccoli given to her by her Ah Mah and she's looking after them well (i.e. hands off - it's the best way so they'll survive!!).
We have some backyard design plans in the wind - will post about that soon, once plans are firmed up. Going to be an edible back yard with interactive spaces for kids!
Until then, happy gardening!
Tuesday, June 14, 2011

Saturday, April 30, 2011
Is crop rotation feasible?
Although we only have one long garden bed, I wonder if we can still apply the crop rotation principles and not plant in same area twice in a row? Might be worth experimenting with anyhow.
I like the overview provided on the Gardening Australia website - ideal for four garden beds if you have such a set up. We also tried to rotate our beds when in Canberra, so will revisit some ideas from our successes (and failures!) there. This guide from Harvest to Table is also useful (and mentions that no garden is too small for crop rotation!).
Companion planting is also a good method for gardening and this guide is a good overview if you are interested in trying out the method, as is this guide.
More on that later; until then, happy gardening!
I like the overview provided on the Gardening Australia website - ideal for four garden beds if you have such a set up. We also tried to rotate our beds when in Canberra, so will revisit some ideas from our successes (and failures!) there. This guide from Harvest to Table is also useful (and mentions that no garden is too small for crop rotation!).
Companion planting is also a good method for gardening and this guide is a good overview if you are interested in trying out the method, as is this guide.
More on that later; until then, happy gardening!
Raised garden bed: no-dig layers
We have finally completed our no-dig garden bed and just in time for some decent rain!
The following pictures depict the layers (as ably demonstrated by our mini-gardener, Clancy), starting with wet newspaper, then sugarcane mulch, homemade compost and a wetting agent, another mulch layer, sheep manure and a dusting of blood and bone, then more mulch to finish.
Layers 1 and 2: Newspaper and sugarcane mulch

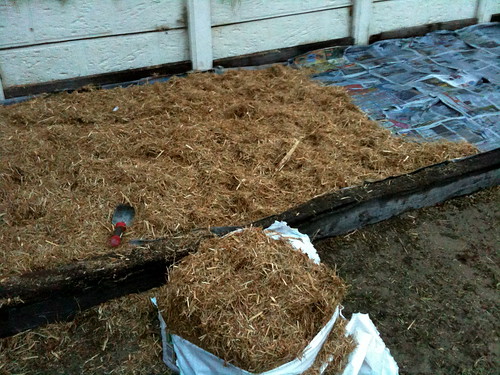
Layers 3 and 4: Compost, wetting agent, then more mulch
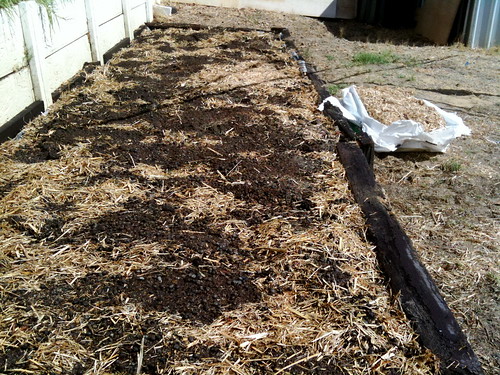
Today (and after letting the bed settle for almost 2 weeks) we planted some mini broccoli and mini cauliflower seedlings, plus some fennel. The bed is holding moisture really well - something to be tested this week as the temperatures warm up again to about 27 degrees. The bed also gets a decent 8 hours of sunshine on most of its 5 metre length - another bonus as the weather cools.
The final addition will be a drip hose watering system, for both grey water (filtered) and potable water (although hoping this can be kept to a minimum). We would like to put in a rainwater tank at some point, but that will need further planning (given we are renting). Would ideally love to set up something similar to the greywater system Josh demonstrated on Gardening Australia (2006)!
So far so good! And to all, happy gardening!
The following pictures depict the layers (as ably demonstrated by our mini-gardener, Clancy), starting with wet newspaper, then sugarcane mulch, homemade compost and a wetting agent, another mulch layer, sheep manure and a dusting of blood and bone, then more mulch to finish.
Layers 1 and 2: Newspaper and sugarcane mulch
Layers 3 and 4: Compost, wetting agent, then more mulch
Today (and after letting the bed settle for almost 2 weeks) we planted some mini broccoli and mini cauliflower seedlings, plus some fennel. The bed is holding moisture really well - something to be tested this week as the temperatures warm up again to about 27 degrees. The bed also gets a decent 8 hours of sunshine on most of its 5 metre length - another bonus as the weather cools.
The final addition will be a drip hose watering system, for both grey water (filtered) and potable water (although hoping this can be kept to a minimum). We would like to put in a rainwater tank at some point, but that will need further planning (given we are renting). Would ideally love to set up something similar to the greywater system Josh demonstrated on Gardening Australia (2006)!
So far so good! And to all, happy gardening!
Thursday, April 7, 2011
Newsflash: Perth gets rain!
It's raining!!! Hopefully with a bit more on the way :)
- Posted using BlogPress from my iPhone
- Posted using BlogPress from my iPhone
Wednesday, March 23, 2011
Raised garden bed: reinforcing the sleepers
Stage 2 of our raised garden bed construction is reinforcing the sleepers. This seems especially useful in the sandy soil, given the plot is on a slope. Simon used large galvanised coach screws to keep the sleepers in place and set the reinforcing stakes at the joins of each sleepers to minimise any movement and water run-off (we hope).
With the sleepers now in place we are ready to constructt the layers of our no-dig garden. First off, however, we will do some minor pulling out of grass (that you can see by the fence/retaining wall) just to minimise regrowth, as the bed is not as deep as we had first envisaged. We should get approx 30-40 cm depth with the no-dig layers, probably higher at first until the layers settle over time.
Next: no-dig layers! :o)
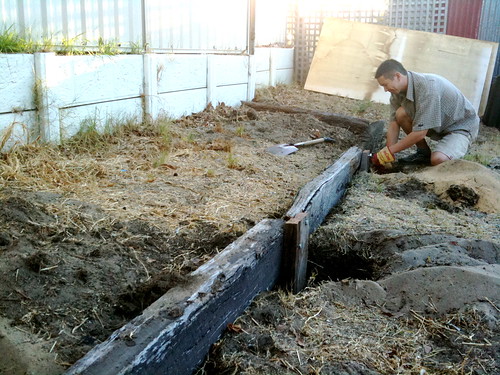
With the sleepers now in place we are ready to constructt the layers of our no-dig garden. First off, however, we will do some minor pulling out of grass (that you can see by the fence/retaining wall) just to minimise regrowth, as the bed is not as deep as we had first envisaged. We should get approx 30-40 cm depth with the no-dig layers, probably higher at first until the layers settle over time.
Next: no-dig layers! :o)
Subscribe to:
Posts (Atom)